

Food is the system that keeps every other system in Core Keeper running: your hunger bar drains on its own clock, separate from your health bar, and the cooked dishes you pull from a Cooking Pot answer that clock three ways at once, restoring more hunger than raw ingredients, adding buffs on top, and paying out Cooking experience with every finished dish. Raw finds will keep you alive in the first hour, but they are a floor, not a plan. This guide covers the hunger rules, the Cooking Pot, the exact steps for your first farm, fishing as your second pantry, and how hand-watered rows grow into automated production.
Quick answer
Your survival rule: Hunger drains constantly and separately from health, so eat before the bar forces the issue, and cook whenever you can
Your kitchen: Any two ingredients in a Cooking Pot make a dish that restores more than the parts, with buffs set by what went in
Your first farm: Hoe the soil, plant seeds, water them, wait roughly ten minutes, and harvest by hand to keep the seed loop alive
Your seed insurance: Harvesting returns seeds most of the time, and the Gardening talent Grateful gardener makes returns guaranteed
Your second pantry: Fishing turns any stretch of water into an ingredient supply, and every catch levels Fishing
At a glance
The clock: A hunger bar that drains on its own, independent of your health bar
The core tool: The Cooking Pot, which combines any two ingredients into one dish
The payoff: Cooked dishes restore more than raw ingredients, carry buffs, and grant Cooking experience when collected
The farm loop: Hoe, sow, water, wait, harvest by hand, replant from returned seeds
Key skills: Gardening, Cooking and Fishing, three of the game's 12 skills, all levelled by doing the activity
Starter foods: Heart berries and bomb peppers to grow, mushrooms to gather
The long game: Sprinklers first, then automated production lines and multi-water fishing pools
1. Hunger runs on its own clock
Your hunger bar and your health bar are two separate systems. Health answers fights, falls and bad decisions; hunger simply drains as time passes, whether you are mining, building or standing still. That separation is the first thing to internalise, because it changes how you plan: a quiet day at base burns food at much the same rate as a day underground, and a long expedition fails on an empty stomach before it fails on enemy damage. Treat the hunger bar as a second clock that every trip has to budget for.
Raw ingredients are the emergency answer to that clock. Mushrooms, heart berries and bomb peppers picked up while exploring will all keep you going, and in the first hour they are most of what you have. Their limit is efficiency: eaten raw, each one gives back only its own small restoration, with no buff attached and no skill progress made. A player who lives on raw finds gathers constantly just to stand still.
Cooked food breaks that cycle, which is why the kitchen belongs at the centre of your base rather than in a corner. The base in the shot below keeps its cooking pots right by the Core, next to where you respawn and where ingredients naturally pile up. Once your meals come from a pot, the same ingredients restore more, start carrying useful effects, and quietly level a skill while they feed you. Sections 2 and 3 build that loop in order: first the pot, then the farm that feeds it.
2. The Cooking Pot turns two ingredients into a system
The Cooking Pot has one rule, and it is generous: put in any two ingredients, and the pot combines them into a single finished dish. There is no recipe book to unlock and no wrong pairing to memorise at the start. What the pairing decides is the result's character. A cooked dish restores more hunger than its two ingredients eaten raw, and it carries buffs that depend on what went in. A pepper-based dish, for instance, might add movement speed, which turns a bomb pepper from a snack into a travel tool. The practical habit this creates is simple: cook first, experiment freely, and start noticing which of your regular ingredients push your regular activities.
The second payoff is invisible until you look for it. Cooking experience is earned when you take a finished dish out of the pot, so every meal you cook for survival is also progress in one of the game's 12 skills. A busy kitchen levels Cooking passively, in the background of a normal session, with no dedicated grind. The same logic runs through this whole guide: in Core Keeper, the chores are the character progression.
Two starting shortcuts are worth knowing. The Chef background begins the game with a Cooking Pot and 8 mushrooms already in hand, skipping the setup entirely, while the Gardener background starts with a copper hoe and a watering can for Section
3. Neither is required, since backgrounds wash out early, but if food is the part of the game you already know you will enjoy, Chef is the smoothest first morning. Keep at least one pot close to your storage: the shorter the loop between ingredients in and dishes out, the more often you will actually cook.
3. Your first farm, step by step
A farm in Core Keeper is a five-step loop, and the first plot only needs to be big enough to learn it. Clear a patch of ground near your base, close to the Core and your chests, and work through the steps in order:
Hoe the soil. Use a hoe on bare ground to till it into planting soil. Tilled squares are your beds; untilled ground grows nothing.
Plant the seeds. Place a seed into each tilled square. One seed, one square, one crop.
Water the crop. Go over the planted squares with a watering can. A watered crop is a growing crop; this pass is the step new farmers most often skip.
Wait for maturity. Crops take roughly ten minutes to mature. Go mining, cook, or explore, and let the clock work.
Harvest by hand. Collect mature crops yourself, by hand. Manual harvesting is what earns Gardening experience, and it is how seeds come back to you.
That last step carries the whole economy of the farm. Harvesting returns seeds most of the time, which means a plot usually replants itself, but "usually" is doing real work in that sentence: an unlucky run of harvests can shrink your seed stock until a crop quietly disappears from your rotation. The fix lives in the Gardening talent tree. The talent Grateful gardener makes seed returns guaranteed, and from that point a planted crop is a permanent asset rather than a slowly draining one. Until you have it, hold a small reserve of every seed you grow and never plant your last seed of anything.
What should go into those first squares? Keep the opening rotation to foods you can actually source on day one:
Swipe horizontally to view all columns.
| Food | Source | Best early use |
|---|---|---|
Heart berries | Grown from heart berry seeds | A dependable staple crop for everyday dishes |
Bomb peppers | Grown from bomb pepper seeds | Cooking ingredient for dishes that can add movement speed |
Mushrooms | Gathered while exploring, no planting needed | Early raw food and a flexible cooking ingredient |
Heart berries are the backbone: a steady, plantable staple that keeps the pot supplied between expeditions. Bomb peppers earn their rows through the kitchen, since pepper-based dishes are the early example of a buff you can feel. Mushrooms need no farm at all: they are a gathering food, a bonus supply that tops up the crops. Together, the three cover the early game.
4. Fishing is the other pantry
Farming is only half of your food supply. Fishing is a full skill in its own right, one of the 12, and it turns any water you find into an ingredient source that needs no soil, no seeds and no watering. The loop is as direct as the game's other gathering skills: cast into water, catch what bites, and take the fish home as cooking ingredients. Every successful hook counts toward the Fishing skill, including the junk catches, so even a poor session at a pond is still skill progress rather than wasted time.
For a food-focused player, fishing fills the gaps farming leaves. Crops arrive on a timer and in batches; fish arrive whenever you choose to stop at water, including mid-expedition, when the hunger clock is loudest and the farm is far away. Fish also diversify the pot: a second ingredient family means more pairings to cook with, and more dishes coming out of the pot means more Cooking experience collected alongside the Fishing experience. The two skills feed each other in both directions.
Start where you are: the Undergrounds are full of cave lakes and ponds, and a rod plus ten quiet minutes beside one teaches the rhythm of the skill. Purpose-built fishing spots, with several kinds of water side by side, are a late-game luxury covered in the next section; the early game asks only that you treat open water as a pantry door and stop at it when you pass.
5. Scaling up: sprinklers, automation and fishing pools
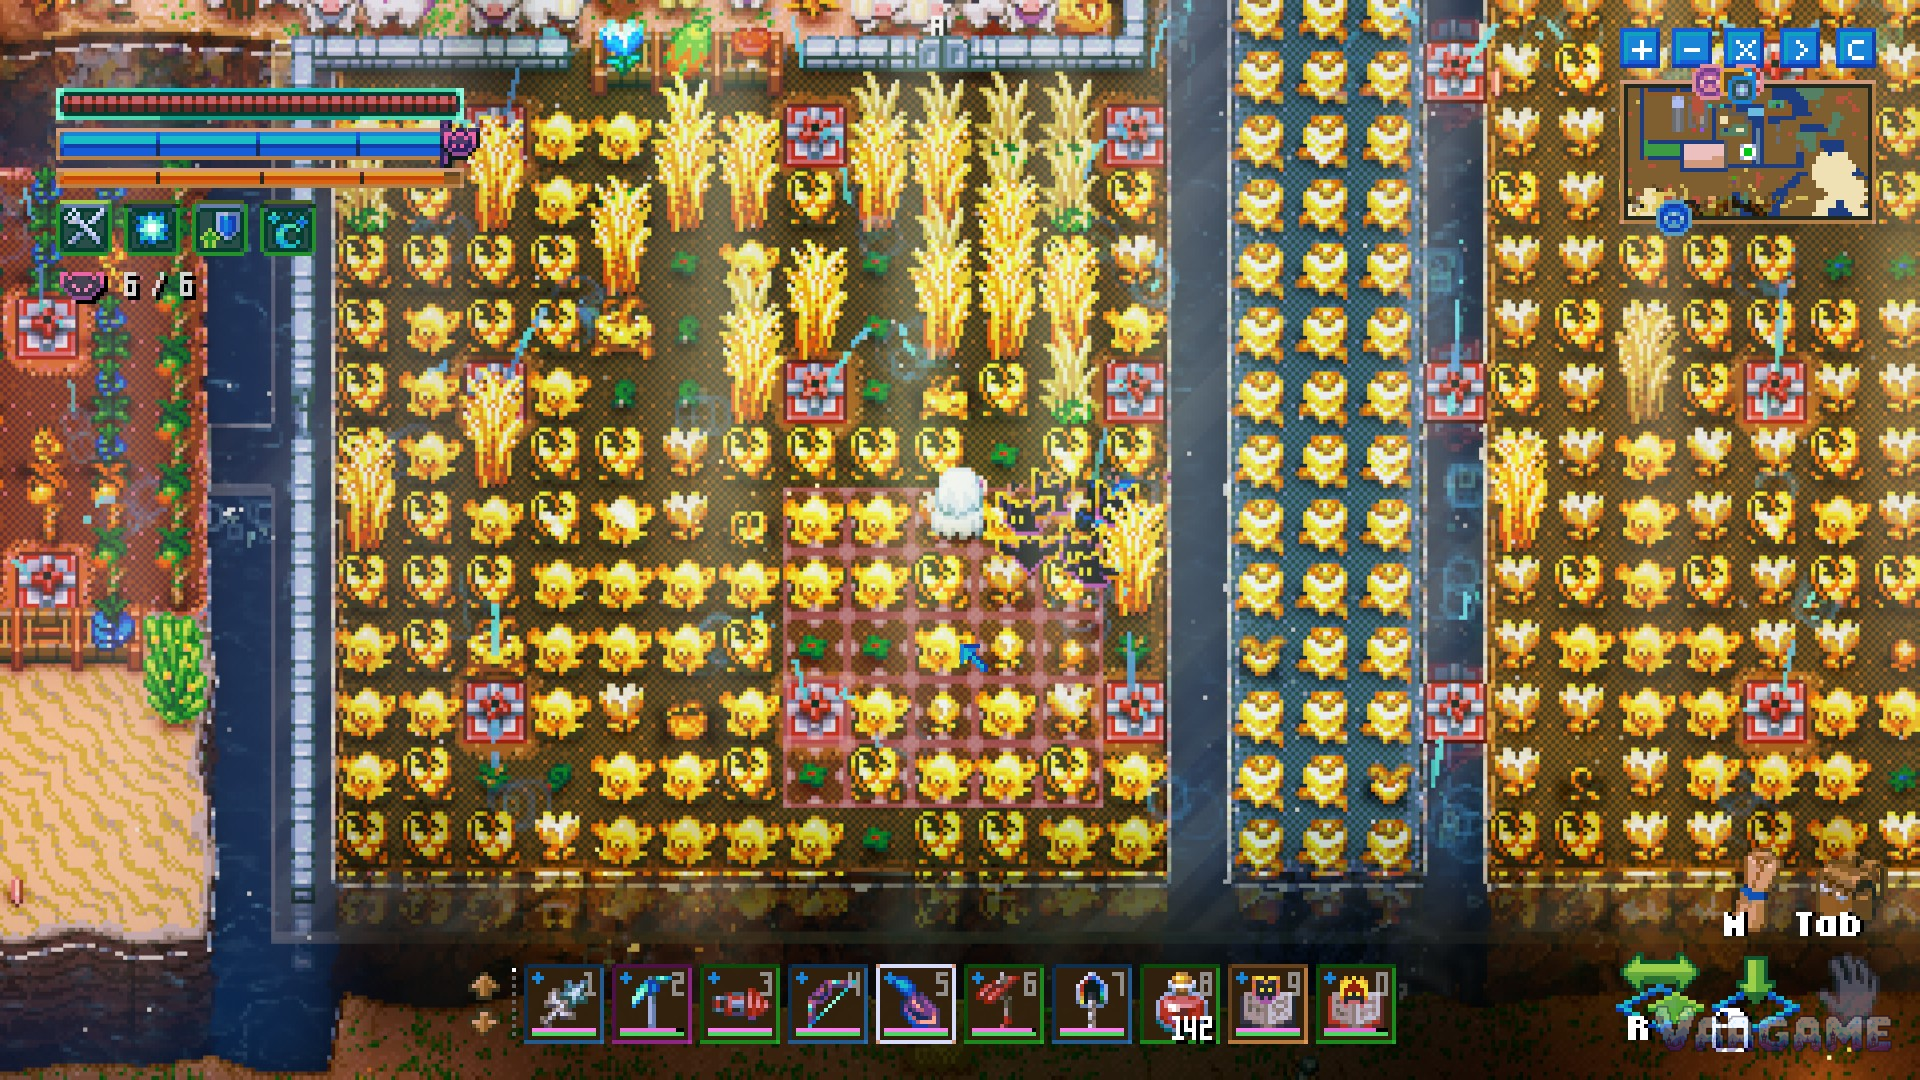
Everything in the first farm is done by hand: you hoe, you water, you harvest. That is correct for a small plot, and it stops being correct as the plot grows, because hand-watering a large field eats the very playtime the farm was meant to support. The first upgrade is the sprinkler, which takes over watering for the squares around it and converts your daily farm round into a harvest-only trip. The heart berry field in Section 3 and the four-zone farm below both run on that pattern: crops divided into zones, sprinklers on a grid, and the player's job reduced to planting and collecting.
Past sprinklers, the same thinking extends across the whole food operation. Core Keeper's later game supports automated production, with drills, conveyor belts and electrical systems moving materials through a base, and a mature kitchen-and-farm setup borrows that machinery instead of doing every step manually. Fishing scales the same way, into the multi-water pools pictured in Section
4. None of this is early-game homework. It is the shape your first 3 by 3 plot grows into, one bottleneck at a time, and each stage only needs to solve the bottleneck directly in front of it.
Common food and farming mistakes
Swipe horizontally to view all columns.
| Mistake | Fix |
|---|---|
Living on raw finds alone | Cook two-ingredient dishes in the Cooking Pot: more hunger restored, real buffs, and Cooking experience on every dish collected |
Planting a huge first field | Start with a small plot you can water by hand, learn the hoe, sow, water, wait, harvest loop, and expand only when sprinklers can take over watering |
Eating or planting your last seeds | Seed returns are only most of the time until Grateful gardener makes them guaranteed, so keep a reserve of every seed and never plant the last one |
Walking past every pond | Fishing needs no farm infrastructure, every catch levels Fishing, and fish give the Cooking Pot a second ingredient family |
FAQ
How do I gain Cooking experience?
Take finished dishes out of the Cooking Pot. Collecting the dish is what pays the experience, so a kitchen that cooks regularly levels Cooking in the background of normal play.
Why did my seeds run out?
Because seed returns from harvesting are only most of the time, not every time. A few unlucky harvests in a row will drain a crop's seed stock. Keeping a small reserve unplanted, and taking the Gardening talent Grateful gardener to make returns guaranteed, both close the hole.
Do I need to plant mushrooms?
No. Mushrooms are a gathering food, found while exploring rather than grown in tilled soil. Plant your rows with crops that do grow from seeds, such as heart berries and bomb peppers, and let mushrooms top up your supply from your backpack.
What should I cook first?
Anything you have two of. The Cooking Pot accepts any two ingredients, so start with your most common supplies, eat the results, and pay attention to pairings you can feel, such as pepper-based dishes that can add movement speed.