

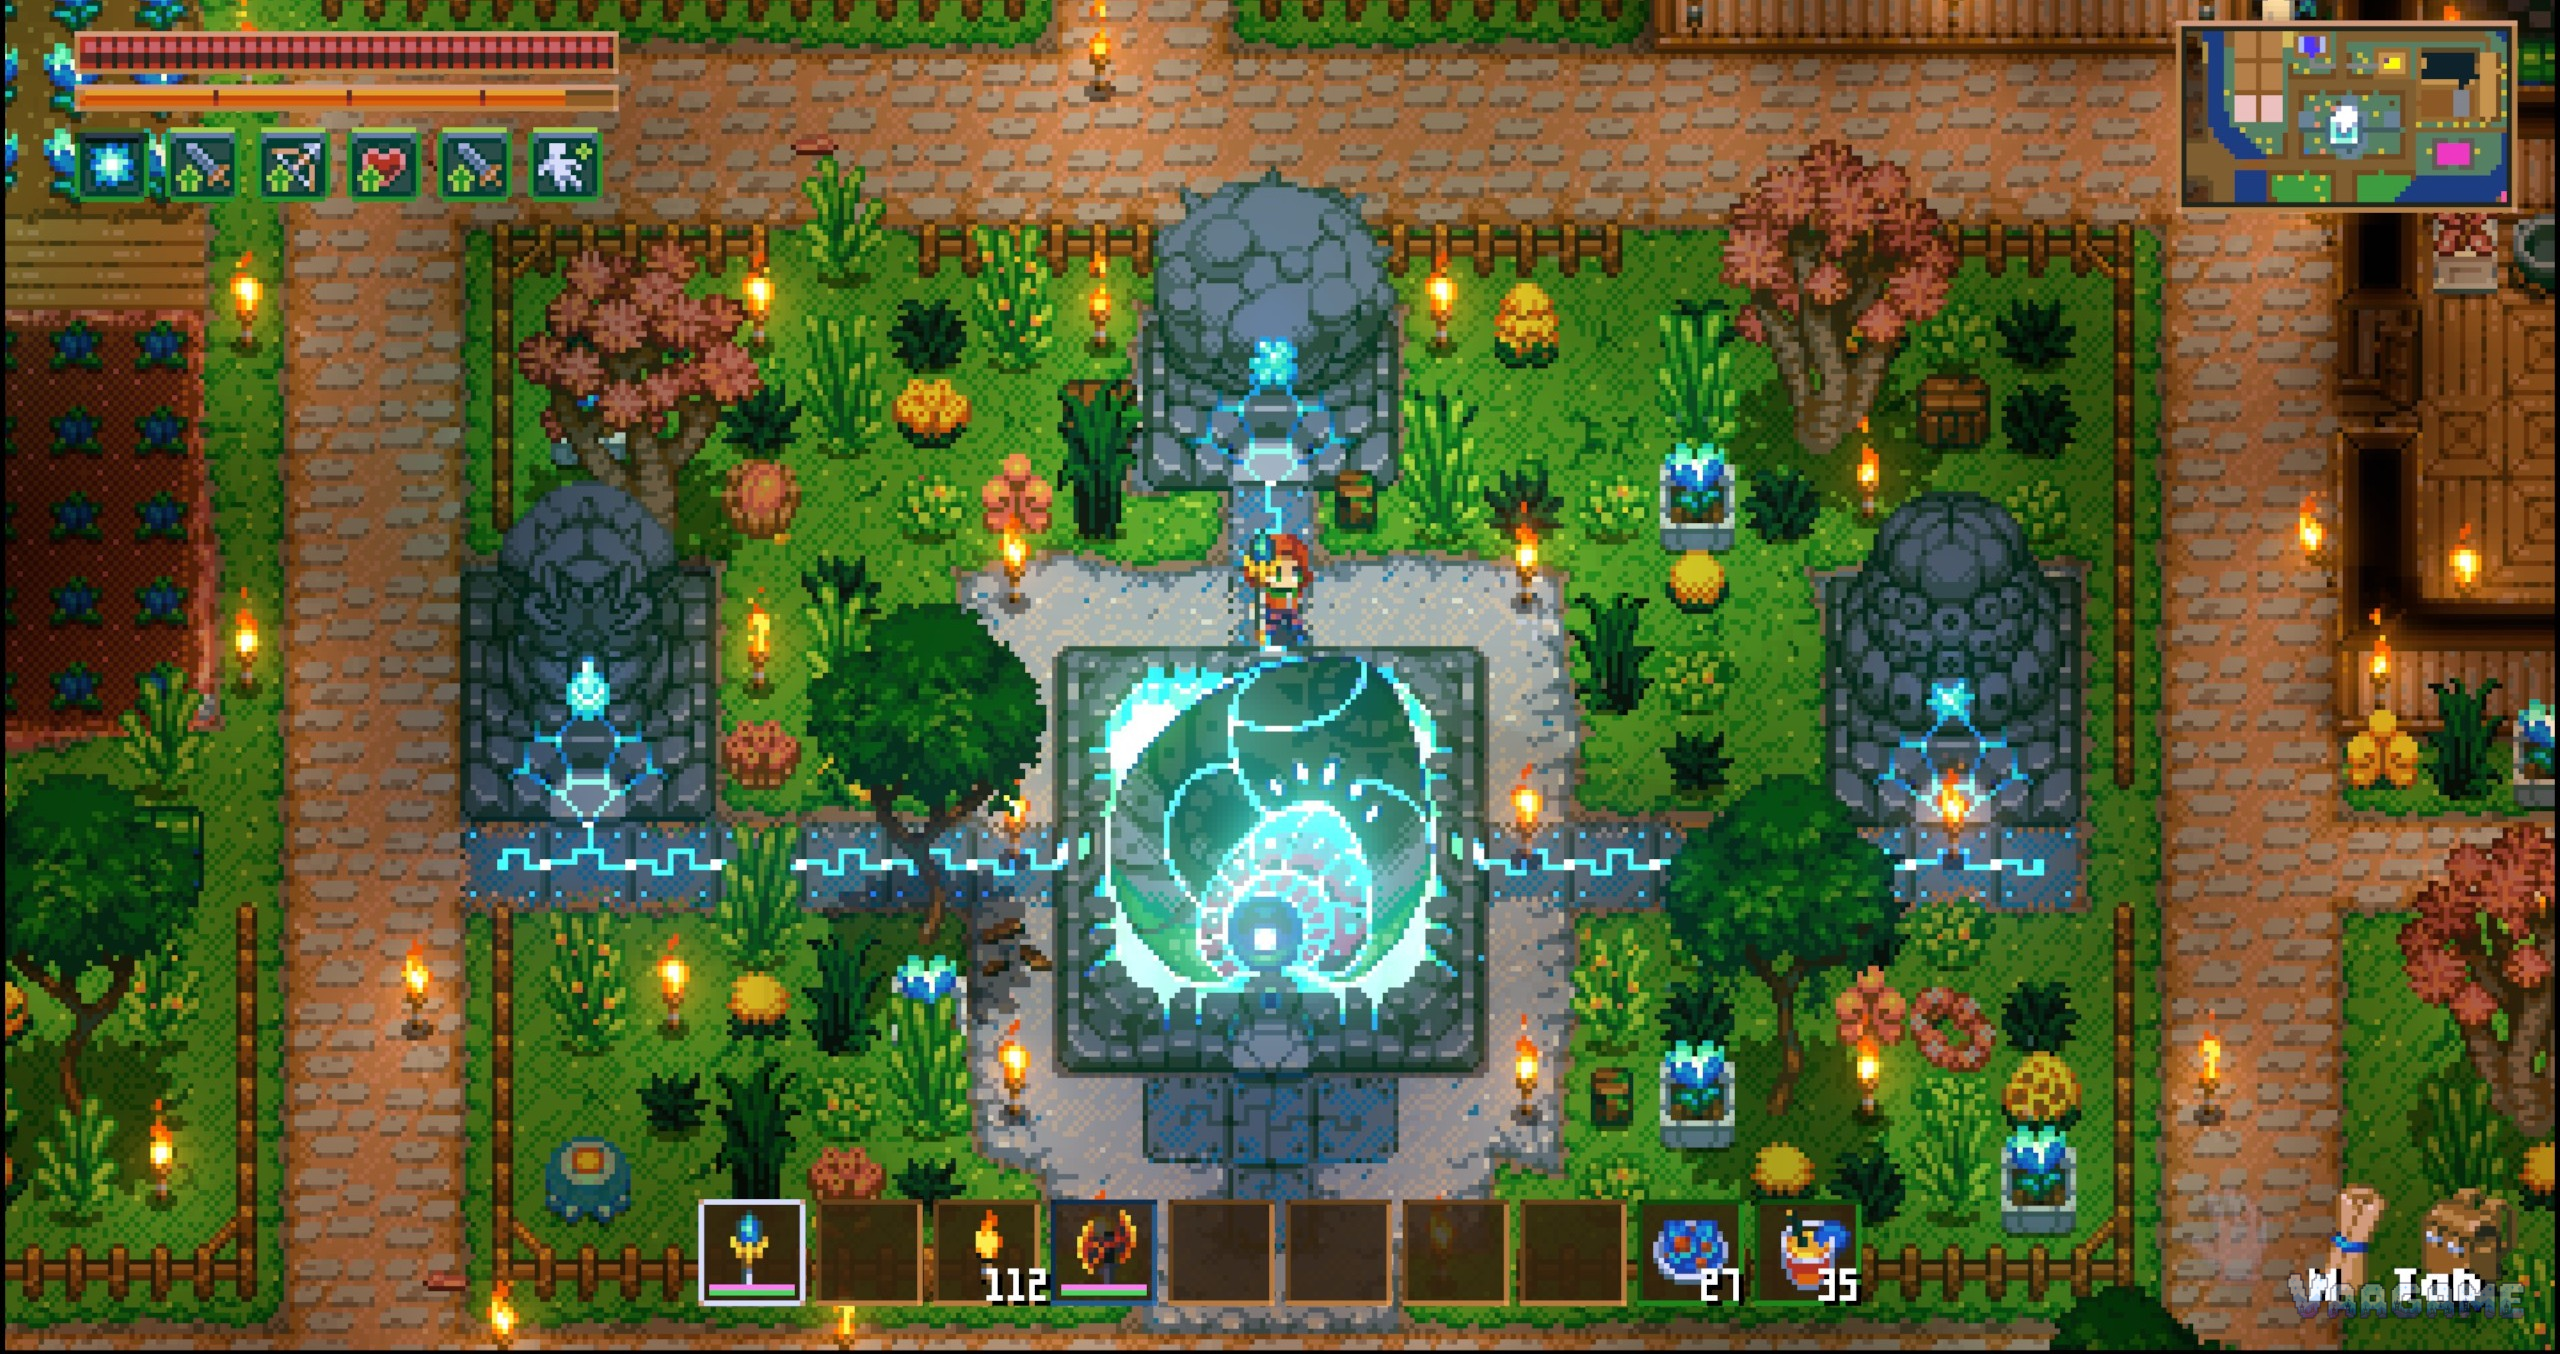
Powering up the Core takes exactly three relics: the Glurch Eye from Glurch the Abominous Mass, Ghorm's Horn from Ghorm the Devourer, and the Stolen Crystal Heart from Malugaz the Corrupted. Set all three into the statues around the Core and the machine wakes, the Great Wall opens, and the outer world unlocks. That is the whole early-game objective in Core Keeper, and this guide takes it apart piece by piece: what each statue wants, where each boss waits and how you reach it, what every activated statue lets you craft, and what changes the moment the third relic lands. It also clears up the most persistent wrong turn in older guides, the Hive Mother, who in the current version has nothing to do with powering the Core at all.
Quick answer
The set: Glurch Eye, Ghorm's Horn and the Stolen Crystal Heart, one relic per statue
The order: Glurch first, because its statue crafts the scanners that locate the other two bosses
The gear: Tin for Glurch, iron for Ghorm and Malugaz; iron is the ceiling until the Core wakes
The payoff: Every lit statue becomes a crafting station, and all three together open the Great Wall
The trap: The Hive Mother is an optional boss, not the third piece of the set
At a glance
Objective: Feed three boss relics to the three statues around the Core
Statues: Glurch (above the Core), Ghorm (to the left), Malugaz (to the right)
Relics: Glurch Eye, Ghorm's Horn, Stolen Crystal Heart
First scanner station: The Glurch statue, once activated
Gear ceiling before power-up: Iron
What opens: The Great Wall, and with it Azeos' Wilderness, the Sunken Sea and the Desert of Beginnings
1. Three statues, three relics
The Core sleeps in its chamber with three boss statues arranged around it: the Glurch statue above it, the Ghorm statue to its left and the Malugaz statue to its right. Each statue accepts exactly one relic, dropped by the boss it depicts, and each one switches on the moment its relic is set in. You never have to wait for the full set to get value from a statue: an activated statue is immediately a crafting station with its own recipe list, so the set pays you back one boss at a time. Only when the third relic lands does the Core itself power up.
Swipe horizontally to view all columns.
| Statue | Relic | Source boss | Crafting station it becomes |
|---|---|---|---|
Glurch Statue | Glurch Eye | Glurch the Abominous Mass | Early boss locator station: Ghorm Scanner, Malugaz Scanner, Slime Sword |
Ghorm Statue | Ghorm's Horn | Ghorm the Devourer | Larva weaponry and recall station: Larva Spike Club, Grubzooka, Recall Idol |
Malugaz Statue | Stolen Crystal Heart | Malugaz the Corrupted | Outer world gateway station: Ancient Hologram Pod, Blue Leather Tome, Ritual Dagger |
Read the table as the route in miniature. The first statue finds the other two bosses for you, the second arms you with larva-based weaponry and a way home, and the third builds the station that points into the outer world. Section 2 walks the hunt itself; Section 3 details what each station crafts.
2. Find the three bosses in order
The three bosses sit at very different distances and ask for different approaches, and the game quietly enforces an order: the scanners that locate the second and third bosses are crafted at the first boss's statue. Work through them in sequence and you will never be searching blind.
Glurch the Abominous Mass: about 65 tiles out
Glurch the Abominous Mass holds court in a slime clearing in the Undergrounds, roughly 65 tiles from the Core. No scanner is needed for this one: when the screen starts to shake and you hear heavy thumping, you are close. Tin gear or better is the comfortable entry point. Kill Glurch, take the Glurch Eye home and set it into the statue above the Core.
That first activation is the hinge of the whole route. The lit Glurch statue is where you craft the Ghorm the Devourer Scanner (3 Ancient Gems and 3 Mechanical Parts) and the Malugaz the Corrupted Scanner (5 Ancient Gems and 5 Mechanical Parts). Use a scanner and it pinpoints that boss's location, turning the next two hunts from guesswork into a straight line on the map. Craft both scanners before you set out again; the parts are far easier to gather now than mid-hunt.
Ghorm the Devourer: intercept the ring at about 250 tiles
Ghorm the Devourer never sits still. This enormous grub circles the Core endlessly on a track roughly 250 tiles out and about 8 tiles wide, ploughing through the Clay Caves and the Forgotten Ruins and smashing everything in its path. Use the Ghorm Scanner from the Glurch statue to find the track, then do not chase the boss along it. Stand on the track, clear the ground around your position, and fight Ghorm as it passes through you. Iron gear is recommended for this fight. Its relic, Ghorm's Horn, fills the statue to the left of the Core.
Malugaz the Corrupted: the throne room in the Forgotten Ruins
Malugaz the Corrupted waits in a throne room in the Forgotten Ruins, and reaching the fight takes one extra step: he is summoned, not simply found. Collect Crystal Skull Shards, combine them into the Skull of the Corrupted Shaman, place the skull on the rune in the throne room, and Malugaz answers. The Malugaz Scanner from the Glurch statue pinpoints the room, which saves a long search through the ruins. By this stage of the route iron is the best gear tier you can own, so come in your best iron set. Malugaz drops the Stolen Crystal Heart, the third and final relic, for the statue to the right of the Core.
3. What each statue unlocks
Think of the statues as three specialised workbenches that happen to be switched on by boss fights. Each one covers a different job, and together they form the toolkit you carry through the rest of the game.
The Glurch statue: your boss locator station
The first statue is the early game's boss-finding station. It crafts the Ghorm the Devourer Scanner (3 Ancient Gems and 3 Mechanical Parts) and the Malugaz the Corrupted Scanner (5 Ancient Gems and 5 Mechanical Parts) covered in Section 2, plus the Slime Sword. If a later route step tells you to scan for a boss, this statue (and, later, the Hologram Pod in the Malugaz list below) is where that chain starts.
The Ghorm statue: larva weaponry and a way home
The second statue turns Ghorm's larva theme into gear: the Larva Spike Club, the Grubzooka, and the Recall Idol. The Recall Idol is the quiet standout of the three, a consumable return tool that takes you straight back to the Core, which makes deep digging trips far less punishing: push out as far as your food and torches allow, then recall instead of walking the whole way home.
The Malugaz statue: the gateway station
The third statue is the one that points outward. It crafts the Ancient Hologram Pod (5 Ancient Gems and 5 Mechanical Parts), the Blue Leather Tome and the Ritual Dagger. The Hologram Pod matters most: it is itself a crafting station, and it is where the boss scanners beyond the first three are made, including the Hive Mother Scanner in Section
5. In other words, the last statue of the power-up set builds the tool that extends boss hunting into the rest of the game.
4. After the Core powers up
Set the Stolen Crystal Heart into the Malugaz statue and the set completes: the Core powers up, wakes, and gives you your next directions. The headline change is the Great Wall, the barrier that has been sealing the starting region, which now opens. Beyond it lie the outer biomes in ring order, Azeos' Wilderness, the Sunken Sea and the Desert of Beginnings, each with its own materials, enemies and Titans.
The gear ceiling lifts at the same moment. Iron was the highest tier reachable while the Core slept, because no higher material could be dug before the wall opened; with the outer biomes accessible, the material ladder resumes and climbs again through Scarlet and beyond. Nothing you built is left behind in the process: the early biomes stay fully open, the three statues keep working as crafting stations, and the Core remains the centre of your base, now with a portal at its feet and the whole map to feed back into it.
5. Side quest: the optional Hive Mother
If an older guide told you the third statue belongs to the Hive Mother, it was working from an outdated version of the game. Before version 1.0, she really was the third boss of the set; in update 1.0.0.1 her statue was replaced by Malugaz's, and her old relic, the Heart of the Hive Mother, is in the game's fiction the very crystal heart that Malugaz stole. Current guides, this one included, follow the version you are actually playing: the Hive Mother is an optional early-game boss, not required to advance the story, and nothing she drops is needed to power the Core.
She is still out there if you want her. The Hive Mother waits at the heart of the Larva Hive, a sub-biome inside the Clay Caves around 330 tiles from the Core, and the way to find her runs through the power-up route itself: craft the Ancient Hologram Pod at the Malugaz statue, then craft the Hive Mother Scanner on the pod to pinpoint her. Iron gear is the comfortable standard for the fight. Treat her as she is now designed, a worthwhile optional detour: a proper boss fight with her own drops for players who want the challenge and the completion, taken after the Core is already lit rather than instead of lighting it.
Common mistakes
Swipe horizontally to view all columns.
| Mistake | Fix |
|---|---|
Hunting the Hive Mother to complete the trio | She is optional in the current version; the third relic is the Stolen Crystal Heart from Malugaz the Corrupted |
Looking for the Hive Mother Scanner at the Glurch statue | It is crafted on the Ancient Hologram Pod, and the pod itself is crafted at the Malugaz statue |
Chasing Ghorm around its track | Stand on the track, clear the ground first, and fight as it passes; the boss comes to you |
Trying to push past the Great Wall before powering the Core | The wall opens only when all three statues are lit, so finish the relic set first |
FAQ
Where do I craft the boss scanners?
The Ghorm Scanner and the Malugaz Scanner are crafted at the activated Glurch statue, for 3 Ancient Gems and 3 Mechanical Parts, and 5 of each, respectively. The Hive Mother Scanner comes later in the chain: it is crafted on the Ancient Hologram Pod, which is itself crafted at the Malugaz statue.
Do I have to beat the Hive Mother to power up the Core?
No. She is an optional boss in the current version. The three relics the Core needs are the Glurch Eye, Ghorm's Horn and the Stolen Crystal Heart. The Hive Mother is worth fighting for her own drops and the challenge, but the Core does not ask for anything she carries.
Can I activate the statues in any order?
In practice, no, and the scanner chain is why. The scanners that pinpoint Ghorm and Malugaz are crafted at the Glurch statue, so Glurch has to come first; the Malugaz statue then gates the Ancient Hologram Pod and everything scanned from it. Gear points the same way, from tin for Glurch up to iron for the other two, so the intended order is also the comfortable one.
Can I still go back to the early areas after powering the Core?
Yes. Powering the Core opens the world outward and seals nothing behind you. The Undergrounds, the Clay Caves and the Forgotten Ruins stay fully accessible, the statues keep working as crafting stations, and tools like the Recall Idol make the trip back to the Core trivial.